Maintenance – Weed Control

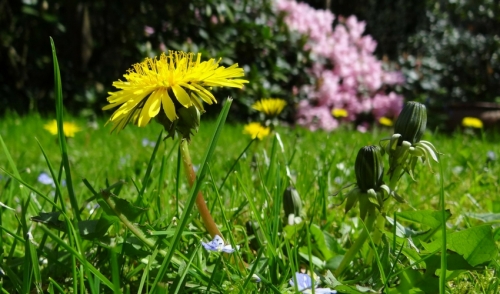
A weed is a wild plant growing where it is not wanted and in competition with other cultivated plants or grass.  Truth be told, almost all lawns have some weeds. What we are talking about here is weed control—not 100 percent weed elimination.

FOUR WAYS TO REDUCE WEEDS IN YOUR LAWN

1. MAINTAIN A LUSH, HEALTHY LAWN

In order to establish itself in your lawn, a weed needs the same three things your lawn requires: contact with the soil, water, and sunlight.

For this reason, weeds are more likely to sprout up in bare or thin spots of your lawn. Your best defense against weeds is to maintain a healthy, lush, dense canopy of grass that outcompetes a weed’s ability to establish itself. The thicker your lawn’s canopy, the less likely weeds will be capable of growing.

Lawns with open canopies such as St. Augustine grass, or those that are slow to recover from damage (centipede grass, some tall fescues, and bluegrass) expose themselves to weed establishment more than those with thicker canopies (zoysiagrass) or those with more rapid recovery from damage (bermudagrass).

2. CONSIDER MOWING YOUR OWN LAWN

If you pay the neighborhood boy to mow your lawn or hire a professional, keep in mind that your lawn is being mowed with the same equipment that just mowed another type of grass. Therefore, it is very likely dispensing small plantlets of another grass variety into your lawn.

For example, if you have a brand new zoysiagrass lawn and Johnny mows it right after mowing the bermudagrass lawn of Mrs. Smith, then you will probably have bermudagrass in your zoysiagrass before too long. This threat is primarily a concern in warm season lawns that are propagated vegetatively, meaning a fragment of the parent plant reproduces more plants.

3. FREQUENT MOWING & HAND PICKING

The great thing about mowing your lawn (assuming you have a walk behind mower) is that you get to walk every foot of your lawn pretty regularly, allowing you to keep a close eye on the status of any potential weeds.

Mowing a weed before it puts up a seed head will eliminate that weed’s ability to spread seeds and propagate the next generation, so mowing alone can be one form of weed control.

If your lawn has relatively few weeds, you should consider just hand picking them. Be sure to pull out the root if you can. It’s good exercise and its 100 percent organic.

4. USE HERBICIDES

Herbicides can be selective or non-selective. Selective herbicides kill some plants but not others. For example, a selective herbicide might kill dandelions, but it will do so without bringing damage to your lawn.

A non-selective herbicide kills all plants in comes in contact with. Unless you want to kill your lawn to replace it, you will only want to use selective herbicides that specifically state they will not kill your lawn type on the label.

Herbicides control weeds one of two ways: before they germinate or after. A pre-emergent herbicide is used preventatively to keep weeds from popping up in the first place. A post emergent herbicide is used after a weed has already established itself in your lawn.

A Word of Caution for Newly Sodded Lawns:

The sod from sod farms are treated on a regular schedule. If you happen to see a weed while laying the sod, its no big deal. Chances are it has already been treated and is dying but it doesn’t hurt to pull it out while its right there.

A pre-emergent contains a chemical that prevents a weed from putting down roots. As a root inhibitor, it can also negatively affect your newly sodded lawn since it too will be trying to put down roots.

If you successfully killed and removed your old lawn including all the weeds in it, your newly sodded lawn should have relatively few weeds. It is suggested that you hand pick weeds out of your newly sodded lawn for the first season.

Nutsedge
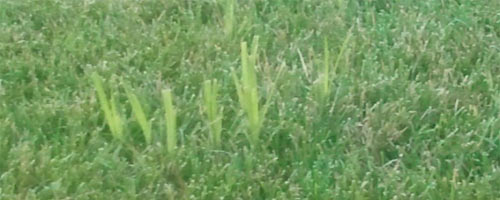
A word about one of the toughest weeds to get rid of and why it shows up in your newly sodded lawn. This discussion has been had many times and after consulting several sod farms, The nutsedge in your newly sodded lawn didn’t come in with the sod. Nutsedge is a plant that reproduces primarily by tubers. When the soil is disturbed either by tilling, digging or raking, you may bring dormant tubers toward the surface where conditions are right for them to grow. If your nutsedge is from tubers and not the nut, it is easier to get under control. Sledgehammer is a brand of herbicide that does very well controlling nutsedge.
Maintenance – Fertilization

GET YOUR LAWN ITS NUTRIENTS

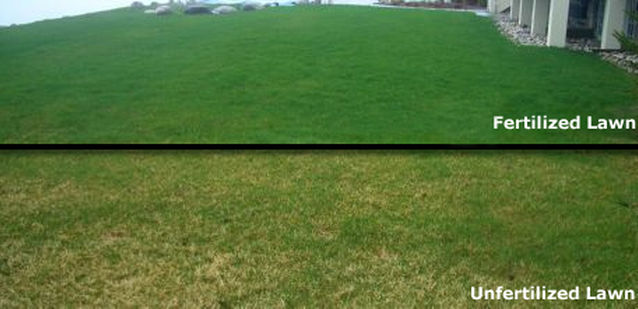
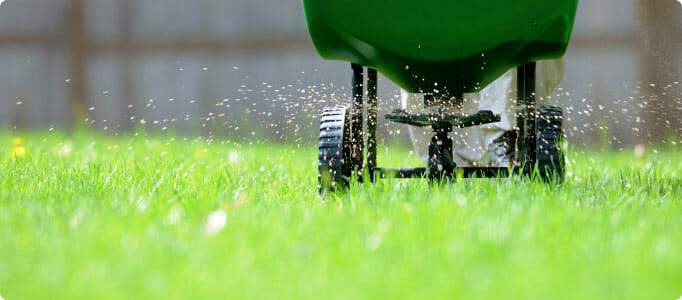
It is becoming clear that alternatives to traditional granular fertilizers exist today. Advanced research and new technology have led to the development of liquid fertilizers worthy of serious consideration.

It is worth noting that the original fertilizers were basic manure from livestock or burned ash spread over fields. Luckily, homeowners today have many less primitive and less odorous options at their disposal. Synthetic granular and liquid fertilization products are either dry coated granules of individual elemental compounds mixed together in a bag or water-soluble elemental compounds mixed together in a bottle.

granular fertilizer

Regardless of the delivery method, these products focus primarily on delivering the three big nutrients that plants need, as denoted by the three numbers you see on bags and bottles of fertilizer, representing the % of each element present in the formulation.

  • Nitrogen (N)
  • Phosphorus (P)
  • Potassium (K)

Nitrogen is unique because, unlike Phosphorus and Potassium, which are naturally present on earth in mineral compounds, it is only naturally present because it is the most abundant gas in our atmosphere. Nitrogen must be combined with Hydrogen to form ammonia, which is then used to create the fertilizers we apply to our lawns as either urea (the most common and cheapest form) or oxidized nitrate fertilizer. Ultimately, Nitrogen gets used in a multitude of metabolic functions of plants, including the formation of amino acids, which are the building blocks of plant protein. You literally see nitrogen at work in the beautiful green color of plant tissue and healthy leaf growth.

Vigorous root growth and enhanced plant vitality can be attributed to Phosphorus. Careful application is essential because it is often abundantly found in soils. Starter fertilizers will include Phosphorus to ensure new sod or seed will put down roots and establish fast.

Potassium plays a key role in photosynthesis by regulating intake of Carbon Dioxide and helping move proteins, water, and other nutrients throughout the plant. In addition to the big three macronutrients, there are a number of other essential micronutrients that play a role in plant health such as carbon, calcium, iron, manganese, copper, magnesium, sulfur, and zinc which all support various metabolic functions of plant health.

One would think if you just applied all of these elements, a great lawn would result. Unfortunately, it isn’t quite that easy. Three critical, often ignored factors can have a large effect on the efficacy of fertilizer. The first is soil pH, the second is the differing needs of the individual elements depending on the plant, and the third is ionic chemistry.

homeowner watering lawn with liquid fertilizer

All of these topics could be the focus of their own feature. That said, a quick summary of these factors  explain why liquid fertilizers can have an edge in each of these categories.

The pH level in soils have a direct impact on a plant’s ability to take in various elements, which is why pH levels are so essential to plant health. Luckily, with a pH ranging roughly from 6.5 to 7.5, the macro and micronutrient uptake potential is pretty high across all elements. Venture into a pH of 8.5 and they fall precipitously for Nitrogen, Phosphorous, Iron, Manganese, Boron, Copper, and Zinc. When pH is low starting at 6.0, Nitrogen, Potassium, Calcium, and Magnesium efficiency begin to take a dive. The bottom line is always keep your pH in check for best results. This can easily be done with an at-home soil test or by sending a sample to a nearby extension service or university soil lab.

Soil tests will also let you know what nutrient deficiencies you may have in your soil. All plants have a genetic yield potential that can be reached when the right nutrients are available at the right time. However, in order to be available to the plant, they must first be broken down into a liquid form small enough to be absorbed by the root system or leaves. When you apply a granular product, the granules sit in the soil waiting for water and microbes to break them down so they can be eventually taken in by the plant. When pH or microbial population levels are not right, this process does not happen efficiently or, even worse, may be completely halted. Fortunately, that is not the case with liquid fertilizers.  They are broken down small enough to be absorbed directly into the plant tissue of leaves and roots without external action.

Achieving your best lawn can happen with either granular or liquid products. 

Maintenance – Mowing

LAWN MOWING GUIDE

Regularly mowing your lawn promotes vertical growth and lateral density; it also provides the manicured look you desire. However, not all grass types are mowed at the same height, so you need to know your lawn type and what it requires.

MOWING HEIGHT

Many people choose to pick a lawn height and mow their lawns at this same height year-round. However, a better option is to vary heights at different times of the year.

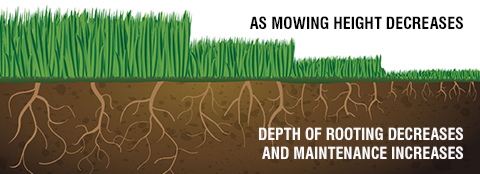
The idea behind altering your mowing heights is to start and finish the mowing season with shorter grass, but to let it grow a bit taller during the hottest times of the year (June–August). This is to promote root growth, keep more moisture in the grass, and aid in times of drought conditions.

Check out the table below for more details as to what heights work best with differing grass varieties.

Mowing Height Ranges by Grass Type

St. Augustine Between 2″–4″

Zoysia (fine) Between 0.5″–1.5″

Zoysia (coarse) Between 1″–2″

Bermudagrass Between 1″–2″

Centipedegrass Between 1.5″–2″

Bluegrass Between 1.5″–2.25″

Tall Fescue Between 3″–4″

MOWING FREQUENCY AND CONSISTENCY

Because most of us are weekend warriors, we tend to mow our lawns either weekly or every other week. Whatever you choose, try to remain consistent.

If you are not able to periodically maintain this schedule (rain, vacation, broken lawn mower, etc.), and your lawn gets really tall, you will want to avoid removing more than 1/3 of the leaf blade in one mowing.

This will stress your lawn and make it go brown for a short time. Instead, you will want to mow multiple times (wait about three to five days between mowing) to get the grass back down to the desired height.

MULCHING

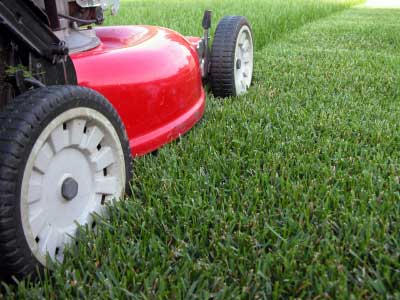
If you have a mulching lawnmower, you should make use of it. Mulching provides free organic material for your lawn and saves you the hassle of bagging. However, mulching may require weekly mowing.

Because grass grows more in late spring and summer, you will be removing more cuttings at this time of year. A weekly mowing and mulching schedule will allow the cutting to be incorporated into your lawn seamlessly.

Mulching every other week in the late spring and summer may result in excess cuttings sitting on top of your lawn, which can be unsightly.

Maintenance – Soil Management

SOIL MANAGEMENT FOR LAWNS

Have you ever heard of the saying that you are what you eat? The same can be said for your lawn’s health starting at the source of nutrient uptake, i.e. the grass’s roots and the soil it inhabits. The quality of your soil plays a huge factor in the overall health of your lawn. Soil provides nutrients, water, air, and a place of anchorage for your grass roots. On the other hand, soil can also contain insects, diseases, nematodes, or overall poor nutrient quality. This blog will cover a general understanding of soils, soil pH levels, and how soil interacts with plant roots so that your lawn is vibrant and healthy.

SOIL TYPE

There are three types of soil: sandy soil, clay soil, and loamy soil.

Sandy Soil

Sandy soil is coarse and gritty to the feel and water moves through it quickly, so it has a low water holding capacity. For this reason, sand is poor in nutrient content.

Sandy soil’s nutrient content can be improved by regularly adding organic material, such as compost or well-rotted manure. This will help improve (slow down) drainage, increase the water holding capacity, and as a result increase plant nutrients.

Clay Soil

Clay soil is reddish brown and is fine and powdery when dry. In contrast to sand, water moves through it slowly, so it has high water holding capacity—typically, too much. Clay soils can be rich in plant nutrients, but the pH is often too high or low, so those nutrients are not available to plants.

Clay soil can be improved by adding organic material, such as compost or well-rotted manure. This will improve (increase) drainage and provide more appropriate water holding capacity. Organic material will also lighten heavy soil.

Loamy Soil

Loamy soil is dark brown and contains clay and sandy soil in moderate proportions with some organic material. Water moves through it at a moderate rate, so it has a moderate water holding capacity. It is rich in plant nutrients. For this reason, loamy soil is ideal for growing healthy grass.

SOIL PH

Image from https://www.agric.wa.gov.au/soil-acidity/soil-ph

pH is a way to explain the amount of hydrogen ions in a solution. In other words, the more hydrogen ions in a solution, the more acidic the soil. Think of pH as the mouth to your grass by which it consumes plant nutrients. The pH scale ranges from 0, highly acidic, to 14, highly alkaline. The mouth of your grass is “wide open” when it has a pH of 6.0 – 7.0, which is neutral and ideal for growing healthy grass. This means that your soil is in the ideal range to receive nutrients.

Grass grown in soils that are too acidic or too alkaline cannot adequately access plant nutrients, whether they occur naturally in the soil or are applied in the form of fertilizer. If you are applying fertilizer to your lawn without knowing the pH to your soil, you could very well be wasting your money. Don’t do it. Instead, invest more time and money in determining the pH balance of your soil first. pH soil testing kits are inexpensive and reliable.

General Sod Installation

image courtesy of Sod Solutions


Installation

Whether you’re doing sod installation on your lawn yourself, or using a professional, it is helpful to know what is involved. Review in detail with your landscaper to avoid dead grass and issues in the future.  When comparing quotes, be sure that both companies are providing the same level of service. If you are looking for professional help for your sod installation, be sure to give us a call and we can recommend some local installers.

Good sod installation always begins with a good foundation. If you do a good job preparing for the sod, a good installation and yard are the result.

Step 1 — Test the Soil

There is no better time to enhance a lawn’s ultimate beauty and success than by improving the soil before any planting takes place. The best way to give your lawn the perfect growing environment is to test the soil before the turfgrass installation to determine its level of nutrients. You can contact your local extension office to obtain a soil test kit. To take a soil test, gather soil samples from several places around the area you’ll be sodding and place the soil from each location in a separate labeled bag. It typically takes about two weeks to receive the results.

Green Brothers Landscape Mix of Flower Mix is a great amendment to any soil. These mixes contain Erth Food, Compost and Granite Sand to provide all the nutrients needed for great soil. If you have a clay type soil, the Flower Mix is recommended at a rate of one and a half cubic yards per pallet and till the Flower Mix into the soil to a depth of 2 to 3 inches. The Landscape mix can be used to level the existing area to a depth of 1 inch and the sod can be laid directly on it.

Step 2 — Measure

A tape measure, distance wheel or the “step” method can be used to measure the area to be sodded, breaking your lawn down into basic shapes and adding them together to get a total square footage.

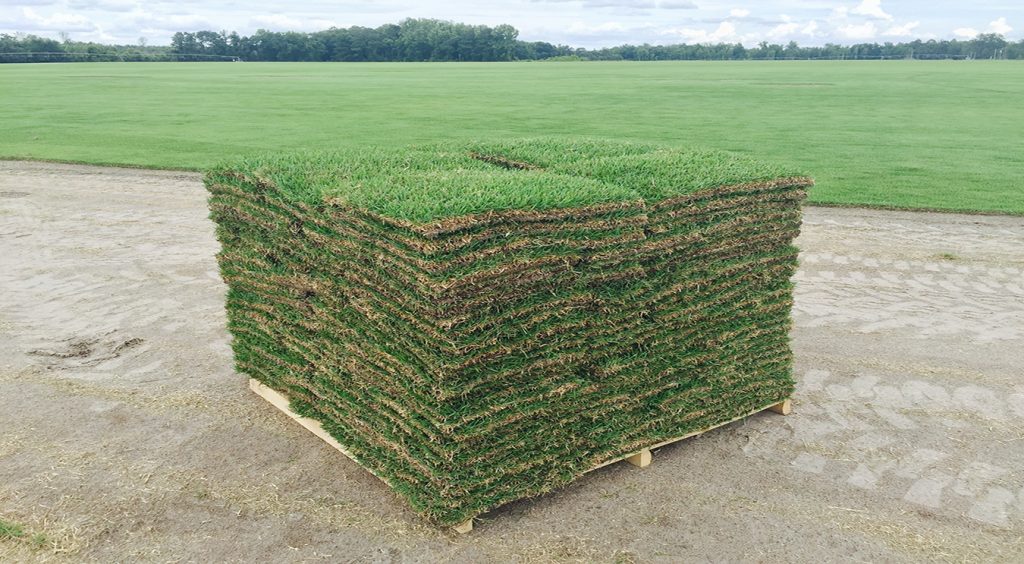
We recommend ordering 5 to 10 percent more sod than you estimate you need to ensure full coverage. Most pallets will be 450 to 500 square feet, which typically is the smallest quantity that can be ordered. A truckload of sod will range from 16 to 20 pallets, depending on where you live.

Step 3 — Kill and Remove Old Grass

Killing and removal of old grass is the next step before the actual turfgrass installation and toward great performing turfgrass. We recommend applying Roundup® or another glyphosate-based product. Glyphosates are broad-spectrum systemic herbicide products designed to kill weeds and competing grasses. They are contact weed killers that require plants to soak up the active ingredient through its leaves, so you’ll want to avoid applying when the grass is wet, when rain is expected or when grass is freshly cut to maximize effectiveness. After applying, wait five to ten days and make a second application if needed. Once you have a fully brown lawn, use a sod cutter or rototiller to remove the top layer of grass and debris to create a smooth and graded surface for laying new turf. Make sure all grass and debris is removed from the landscape, but remember to mark any irrigation heads to avoid breaking them.

Step 4 — Site Preparation and Grading

Proper site preparation makes it easier for new grass roots to penetrate deeply and evenly. Deep roots will make the lawn denser and drought resistant and will allow more efficient use of water and nutrients. A dense lawn crowds out weeds and better resists insects and disease. Turfgrass Producers International recommends the following site preparation steps:

  • Clear the site of all building materials (wood, cement, bricks, etc.), as well as any buried stumps,
  • rocks, stones or other debris that is larger than 4–5 cm (2–3 inches) in diameter.
  • Rough grade the entire area to eliminate any drainage problems on the property. This would include sloping the grade away from building foundations, eliminating or reducing severe slopes and filling low-lying areas. A tractor-mounted blade and/or box are most often used for rough grading, but if the area is smaller, it can be done with hand tools.
  • Initial tilling, to a depth of at least 5 cm (2 inches), should be completed prior to adding any topsoil or soil amendments. This will control most annual weeds, alleviate subsoil compaction and permit a bonding of the topsoil to the subsoil and improve root penetration and water movement.
  • Add topsoil to achieve a total topsoil depth of 10–15cm (4–6 inches) after firming. The topsoil should be a loamy sand, sandy loam, clay loam, loam, silt loam, sandy clay loam or other soil suitable for the area. Incorporate humus (fully decomposed organic matter) into the topsoil, if possible.
  • Finish grade the entire site, maintaining the rough grading contours and slopes using a tractor- mounted box blade for large areas or heavy-duty rake on smaller sites.
  • Roll the area with a lawn roller, one third full of water, to firm and settle the surface and reveal any low spots that should be filled to match the surrounding grade surface. If time permits, allow the area to settle further with rainfall or by applying irrigation water.

Step 5 — Lay and Roll Your New Sod

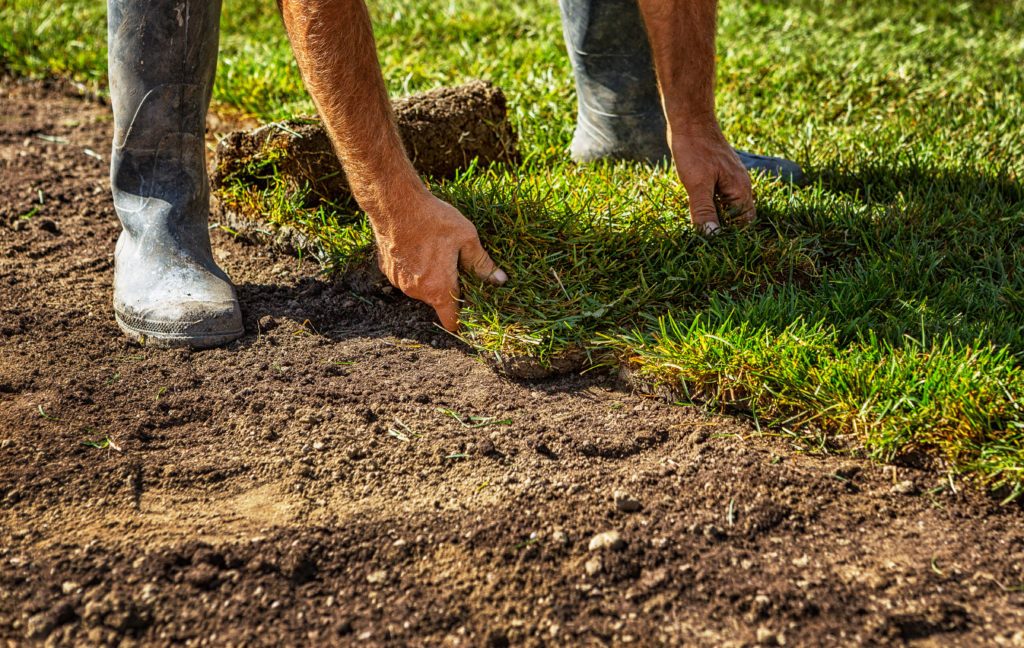
Be sure to have sod off the pallet and in your lawn within 48 hours or less of delivery. Same day installation is preferable to avoid grass drying out as it sits on pallets. When laying sod, it is best to use a brick pattern with offsetting seams. Use a landscape edger or machete to cut around corners and at the edges. A handy tip is that most sod harvesters don’t cut straight down, but at a slight angle. You can use this to your advantage to get tighter seams by matching the angle on the pieces to fit together as snugly as possible. Once installed, the grass should be rolled for smoothness. Visible seams will disappear in a few short weeks.

Step 6 — Water, Fertilize and Mow

Sod should be watered thoroughly when installed. Soak upon installation and water, as needed, to keep grass from drying out. Overwatering for an extended period, however, will severely damage the turf, causing disease and rotting roots. It usually takes 10 to 14 days during the active growing season for the sod to establish, but it may take longer during cooler weather. For the first two to three weeks after installation, try to keep traffic to a minimum to give the roots an opportunity to firmly knit with the soil and ensure that it will remain smooth and level. Proper rooting can be checked by lifting a corner and noting if “white” roots have connected to the ground.

Mowing of the new sod should be done 10 to 14 days after installation during the growing season. Your sod should arrive with a fresh application of fertilizer which will last for a few weeks. If you prepared the area with Green Brothers Landscape Mix or Flower Mix, you should not have to fertilize this season. See our entry on fertilization for ongoing maintenance.

Some things to keep in mind are:

  • Sandy soils usually require more water to keep the turf healthy because sand drains faster than clay or heavier soils.
  • As a general rule, the further south you are, the longer your growing season. This means that your lawn may require increased fertilization.
  • Grass in partial shade will remain wet longer than grass in full sun. Watering should be adjusted accordingly.
  • Overwatering can be just as harmful as under watering because grass that stays moist all of the time is at high risk of fungus and disease.
  • If you see your grass turning brown during the growing season, you most likely have a fungus, disease, or insect issue.

When is the best time to lay sod?

This entry is provided courtesy of Sod Solutions/Sod University.

WHEN IS THE BEST TIME TO LAY SOD?

We are often asked the question, “When is the best time to lay new sod?” Well, believe it or not, the most ideal time is either early or mid-fall. Spring is also a great time of year to complete this landscaping project. Different times of the year may be better depending on where you live, however from a broad perspective, early and mid-fall are usually the best times of the year. You can successfully lay sod in any season, and we’ll explain how here.

How to Lay Sod in the Fall

Laying sod in the early fall or mid-fall tends to be the best time to lay sod. This is because the temperatures have cooled down from the summer highs and you tend to get more precipitation during these months. There is plenty of time between fall and winter for the sod to root and establish prior to dormancy which means in the winter, your lawn will be healthy, full, and easy to green up in the spring.

Here are some key things to aware of when laying sod in the fall:

  • Similar to other times of the year, you’ll want to maintain a healthy watering schedule that keeps the sod moist, but not too wet during the first 14 days of fall. As a general rule, keep the soil moist two to three inches below the surface when establishing.
  • Be sure to fertilize your lawn to promote healthy rooting and establishment. We recommend our Landscape Mix for proper lawn nutrition as your sod begins to take root and establish itself before dormancy.
How to Lay Sod in the Winter

A good number of people, particularly in the south where warm season grasses are grown, believe that laying sod in the winter isn’t possible. People think that either the sod is brown and therefore dead, or that they don’t need to water it—both of those statements are wrong. When laying sod in the winter in the south, the sod can look dormant, but dormancy is just like hibernation—it will be off-color and appear dead, but will regain its color in the spring when temperatures warm up. Similarly to all other seasons, water is very important and you will need to dampen the soil prior to laying the sod and continuously water the sod to ensure it stays moist.

Here are some key things to be aware of when laying sod in the winter:

  • Your sod will not green up until the spring. Do not be concerned about this.
  • You will need to continuously water the grass throughout the winter and its dormancy. Cold, dry winds can dry out the roots quickly and cause major issues.
How to Lay Sod in the Spring

Spring is the second best time to lay sod, and in certain cases (depending on where you live), it can be an even better time to lay sod.

Here are some key things to be aware of when laying sod in the spring:

  • Make sure there are no more opportunities for a freeze before laying new sod.
  • Be sure to keep an eye on weather. You will want to make sure that you keep your sod extra moist to maintain root health—especially if you get an early hot day.
  • Water shadier spots less than the sunnier spots to help reduce disease.
  • Be sure to fertilize your lawn to promote healthy rooting and establishment.
How to Lay Sod in the Summer

Summer is a tough time to lay sod. It is very hot and sometimes drought prone depending on your location. If you need to lay sod in the summer, be ready to water your new lawn very often as a means of maintaining its health. You will want the soil to be damp three to four inches below the surface. Water often to make sure of this.

Here are some key things to be aware of when laying sod in the summer:

  • Keep your lawn moist, but do not overwater it—if you do this, it will be susceptible to disease.
  • Water your lawn early in the morning, midday and early afternoon to help make sure it does not dry out.
  • Taper back watering in the shadier spots since these areas are more prone to fungus and disease pressure.
  • Be sure to fertilize your lawn to promote healthy rooting and establishment.

Welcome!

This is a blog created by the sod experts at Green Brothers Earth Works. We will try to highlight some myths, answer frequent questions and offer advice on all matters sod. Green Brothers carries Bermuda, Centipede, Fescue and several varieties of Zoysia sod. Green Brothers does not offer installation but are familiar with numerous contractors that we can recommend or offer advice for those that want to do it themselves.

Material contained in this blog are the opinions of employees. Many items are from contributors such as Sod Solutions/Sod University, Walter Reeves, The University of Georgia and others. We do thank our contributors and give them full credit for their help. We do our best to verify factual information but much of the information is the opinions and experience of people who have been in the business for decades. Please feel free to contribute or call us out if you don’t agree with our position.